AEM comes with a pre-installed feature to import feeds into CQ. Feed importer comes with capability to import RSS and Atom feeds.
Hey!! Wait before that you must be thinking, what is a feed?
Web feed is a way to provide users with updated content. Web feeds are commonly used for news updates as news are the most frequently updating data.
Feed importer is a service to fetch data from feeds or any external source of data on a periodic basis and save data fetched, in the form of CQ page.It polls the specified external data source in given interval.
Firstly, create a page under which all the imported data will be saved in the form of CQ:Page. All the new pages that will be created under root page will have sling:resourceType property's value same as the root page.
Now once root page is created, create Feed importer :
Open http://<host>:<port>/etc/miscadmin and go to importers

Now click on the Add button and complete the dialog as shown below:
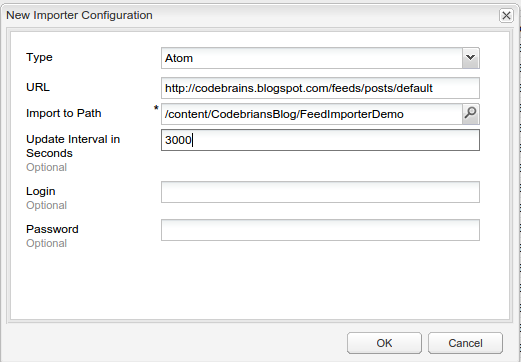
Here is link for Atom feeds of Codebrians blog :
http://codebrains.blogspot.com/feeds/posts/default
The moment OK is clicked a Polling configuration node is created, that will poll given feed URL and fetches new data back to CQ then creates pages under given hierarchy.
Here is the one of the auto-create page:

Here is the Link to Github repository of Codebrains to refer the code :
https://github.com/ankit-gubrani/Codebrains
Hey!! Wait before that you must be thinking, what is a feed?
Web feed is a way to provide users with updated content. Web feeds are commonly used for news updates as news are the most frequently updating data.
Feed importer is a service to fetch data from feeds or any external source of data on a periodic basis and save data fetched, in the form of CQ page.It polls the specified external data source in given interval.
Here are the steps how to create feed importer in CQ :
Firstly, create a page under which all the imported data will be saved in the form of CQ:Page. All the new pages that will be created under root page will have sling:resourceType property's value same as the root page.
Now once root page is created, create Feed importer :
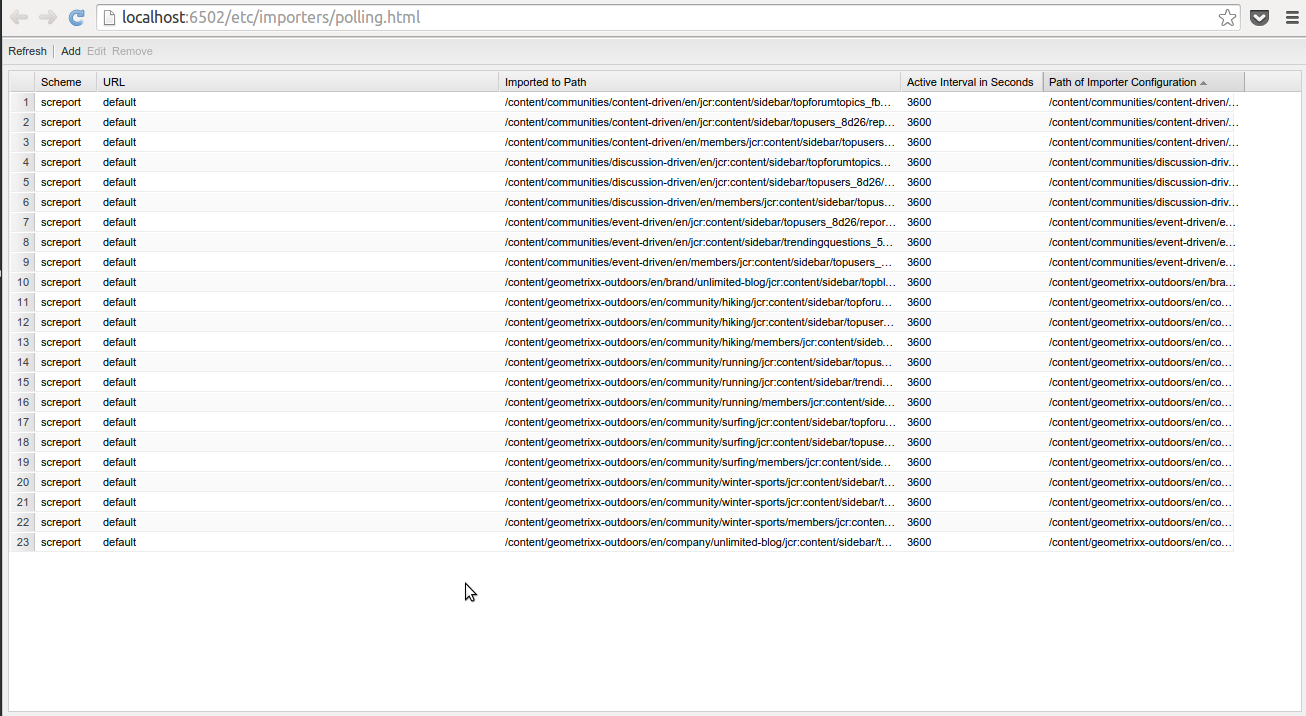
Open http://<host>:<port>/etc/miscadmin and go to importers
And Open the Feed Importer page, it will open a page as shown
below :
Here is link for Atom feeds of Codebrians blog :
http://codebrains.blogspot.com/feeds/posts/default
The moment OK is clicked a Polling configuration node is created, that will poll given feed URL and fetches new data back to CQ then creates pages under given hierarchy.
Here is the one of the auto-create page:
Here is the Link to Github repository of Codebrains to refer the code :
https://github.com/ankit-gubrani/Codebrains